500W Solar Power Generation LiFePO4 Power Station Battery Backup
Portable Solar Generator
Our products are designed to keep you powered while you’re doing what you love. Whether you’re climbing in the Himalaya, living in your van while you travel the world, or camping in your backyard we will keep you powered.
Getting Started
1.Get to Know Your Generator
2.Package contents
3.What it Powers
Charging your Generator
1.Charging from Solar
2.Charging from the wall
Using your Generator
1.What can I Power?
2.How to Use
3.Best-Use Strategy
4.Cold Weather Usage
5.Pure-Sine Wave Inverter
6.Storage and Downtime Maintenance LCD Indicator
Frequently Asked Questions Education
2.Solar 101 Cautions
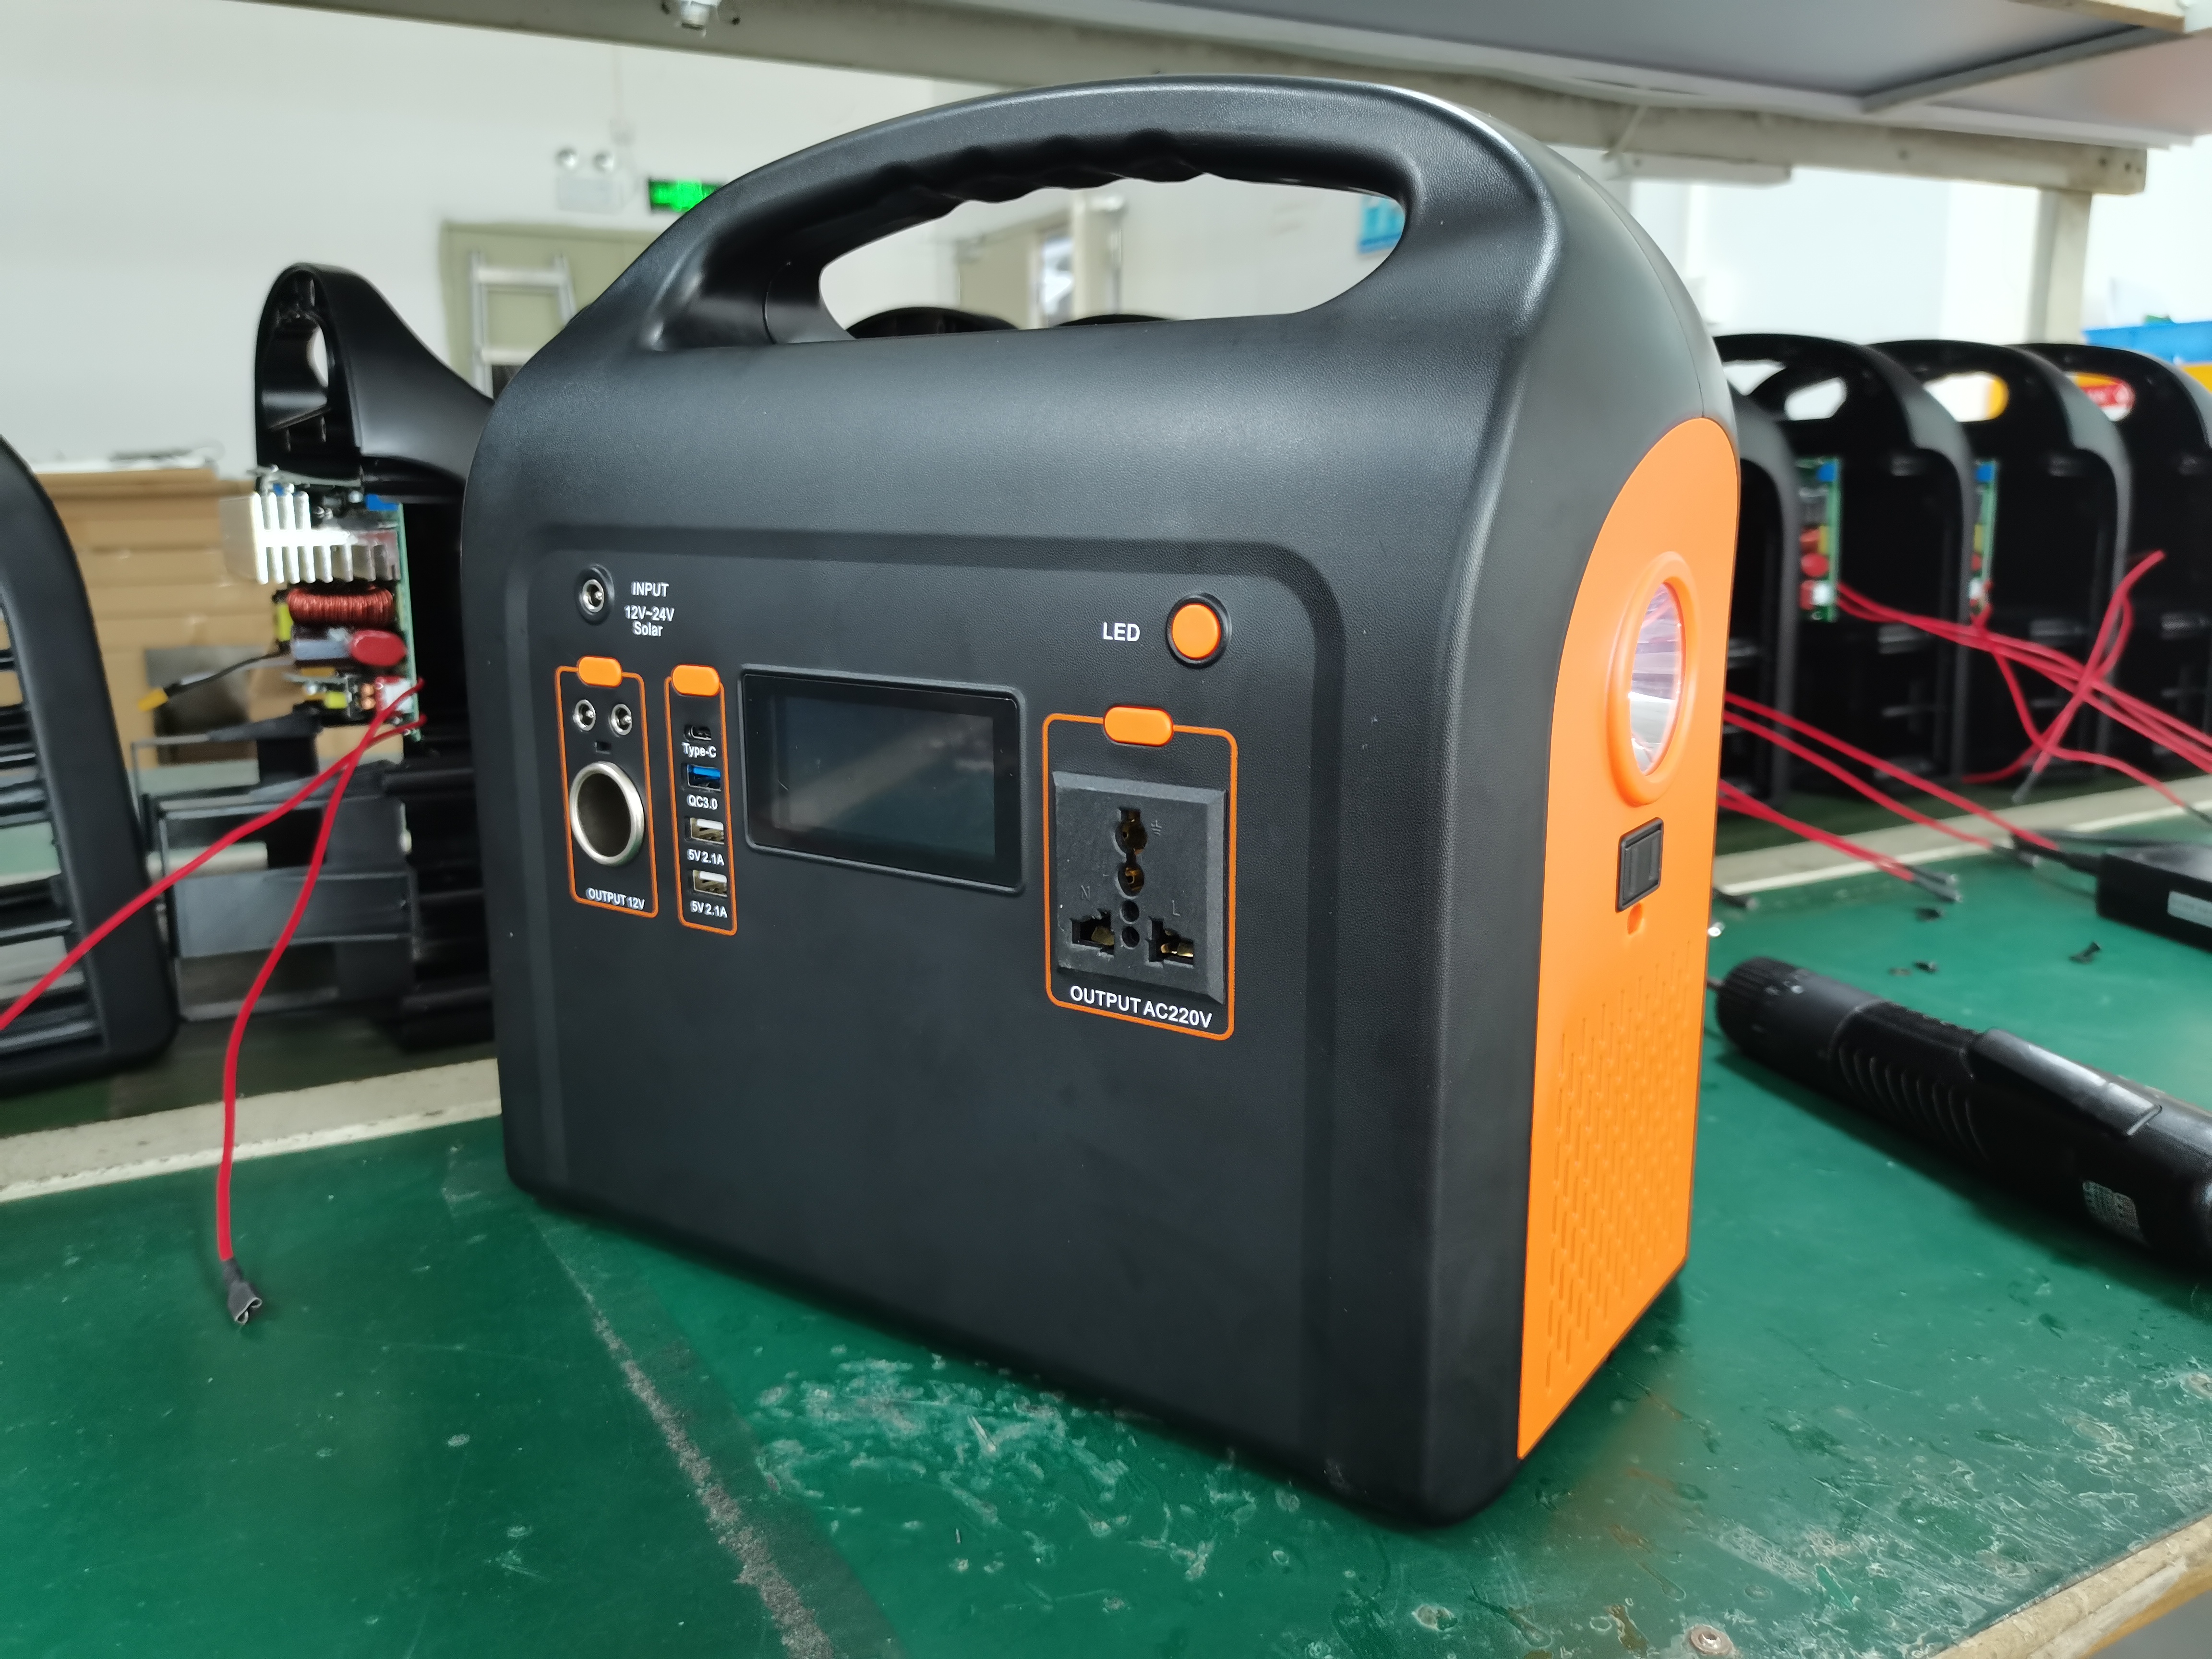
Portable Solar Generator, a plug-and-play generator for emergencies, camping, or wherever you need power. you can keep Quadcopter drone, mini CPAP,fan,car mini refrigerator,laptops,lamp and more appliances going for hours longer.
CHARGE ME NOW: Before using or storing, plug your generator by 18V/5A adapter into the wall until it is fully charged. If at any point when 1st LED blinking from your generator, plug it into a power source, like an AC outlet or a solar panel, as soon as possible. This built-in warning indicator is to help prevent battery damage when the charge gets low. For more tips and tricks on keeping your battery healthy, see the BATTERY 101 section.
Power LCD Indicators: The power LCD indicator indicates the charge level of your generator. There are 4 segments to the battery, approximating 20% - 40% - 60% - 80%-100% capacity. As you use your generator,indicating the remaining charge. When charging your generator you will notice a battery segment blinking at a 1 second interval. This indicates the current charge status. Once your generator is fully charged, all battery segments will be lit and remain solid.
◆ Charging from Solar Panel
The generator charging port is located on the top-left corner of the faceplate.This DC port is designed to work with our solar panels and is capable of taking in 18V output of solar.

1. Place your solar panel where it will get as much direct sunlight as possible. 2.Connect with solar panel to DC INPUT port on the front of the generator. You will know the generator is charging when the blue LED light next to the INPUT port lights up, and the battery LCD indicator are blinking. The generator is fully charged when all battery segments stop blinking and remain solid.

◆ Charging from the Wall
Using the included AC 18V/5A adapter, plug your generator into any wall outlet by 18V/5A adapter. You will know the generator is charging when the blue LED light next to the INPUT port turns on, and battery LCD indicator are blinking. The generator is fully charged when all battery segments stop blinking and remain solid. The generator should recharge from the wall in about 5 hours.
 Specification
Capacity: |
384Wh (12.8V30AH) |
option |
|
|
537Wh (12.8V42AH) |
|
|
Battery Type: |
LifePO4 |
|
Input: |
DC 18V/5A by Adapter or Solar Panel |
|
AC Output Power: |
Rated Output Power: 500W max |
AC Output: |
100-120V~/60Hz ( for Generator1 version) 220-240V~/50Hz ( for Generator2 version) |
DC Output: |
USB-1:5V/2A Max USB-2:5V/2A Max USB-3:QC3.0 Type-C:18W
12V car cigarette |
|
Inverter Waveform: |
Pure Sine Wave |
|
Net Weight: |
5.5Kg |
|
Dimension: |
300x300x155mm |
|
Warranty: |
12 months |
|
Protection: |
Low Voltage Protection Over Voltage Protection Over Power Protection
Over current Protection
Short Circuit Protection
Over Temperature Protect |
Our products are designed to keep you powered while you’re doing what you love. Whether you’re climbing in the Himalaya, living in your van while you travel the world, or camping in your backyard we will keep you powered.
ODM Solar


